Meter
This page provides a short overview of the Meter page.
Overview
On the Meter page, all meters created in the project are listed. This includes all created electricity meter, gas meter, heat meter and cold meter. Meter that are marked as not relevant for billing are flagged as "Submeter" in the list. Meters marked as submeters are not included in the calculation of total energy consumption, CO2 emissions and energy costs. The calculation of the total KPIs includes only the main meters and the result is displayed in the first row of the table together with the total number of meters.
The calculated energy consumption, CO2 emissions and energy costs are listed for all meter. The period for the calculation of the KPIs can be selected using the Date Picker in the upper right corner. If no data is available for a part of the selected period, a message is displayed prompting the user to enter the missing data.
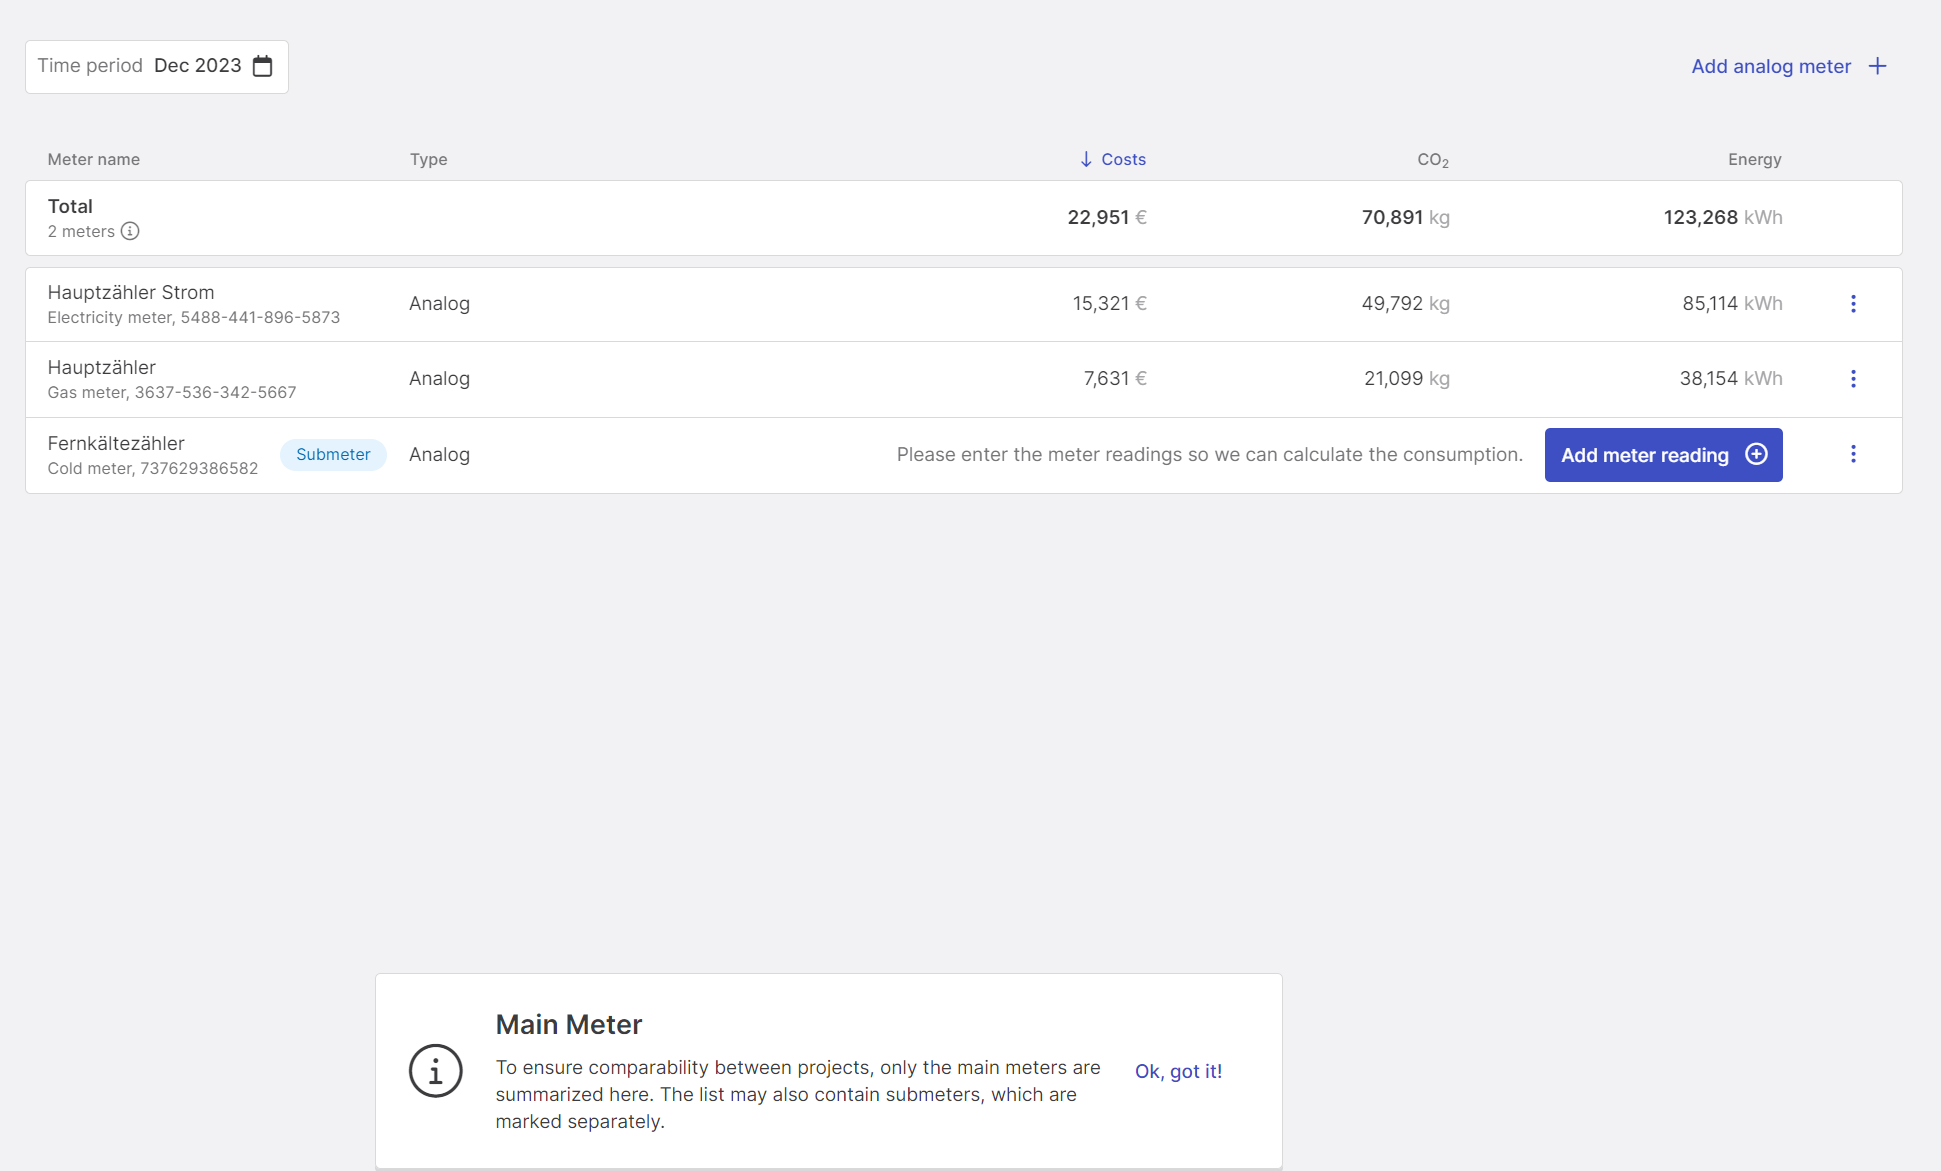
Figure 1: Meter page
Digital meters do not offer the option of entering a meter reading manually. The recorded data can be visualized directly via the plotting icon.
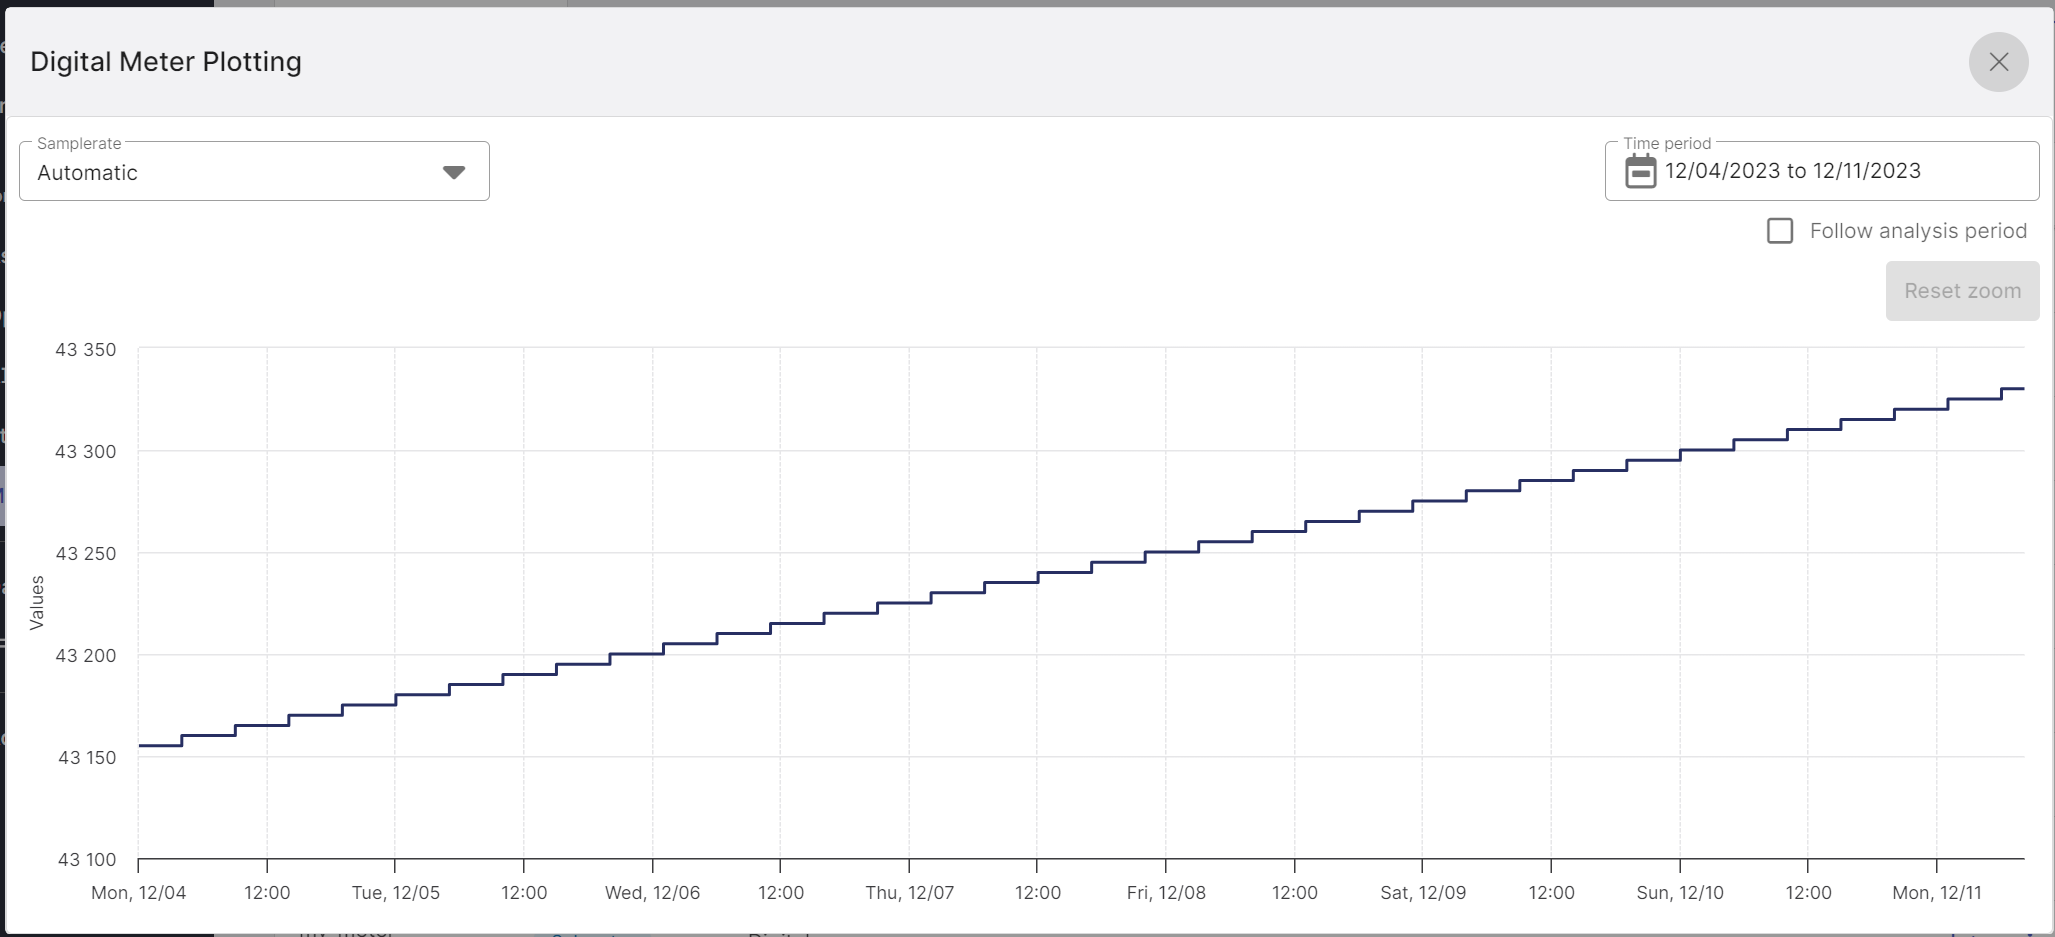
Figure 2: Visualization of the count value of a digital meter
Figure 3 shows the Date Picker, which enables the selection of the time period for the calculation of the KPIs.
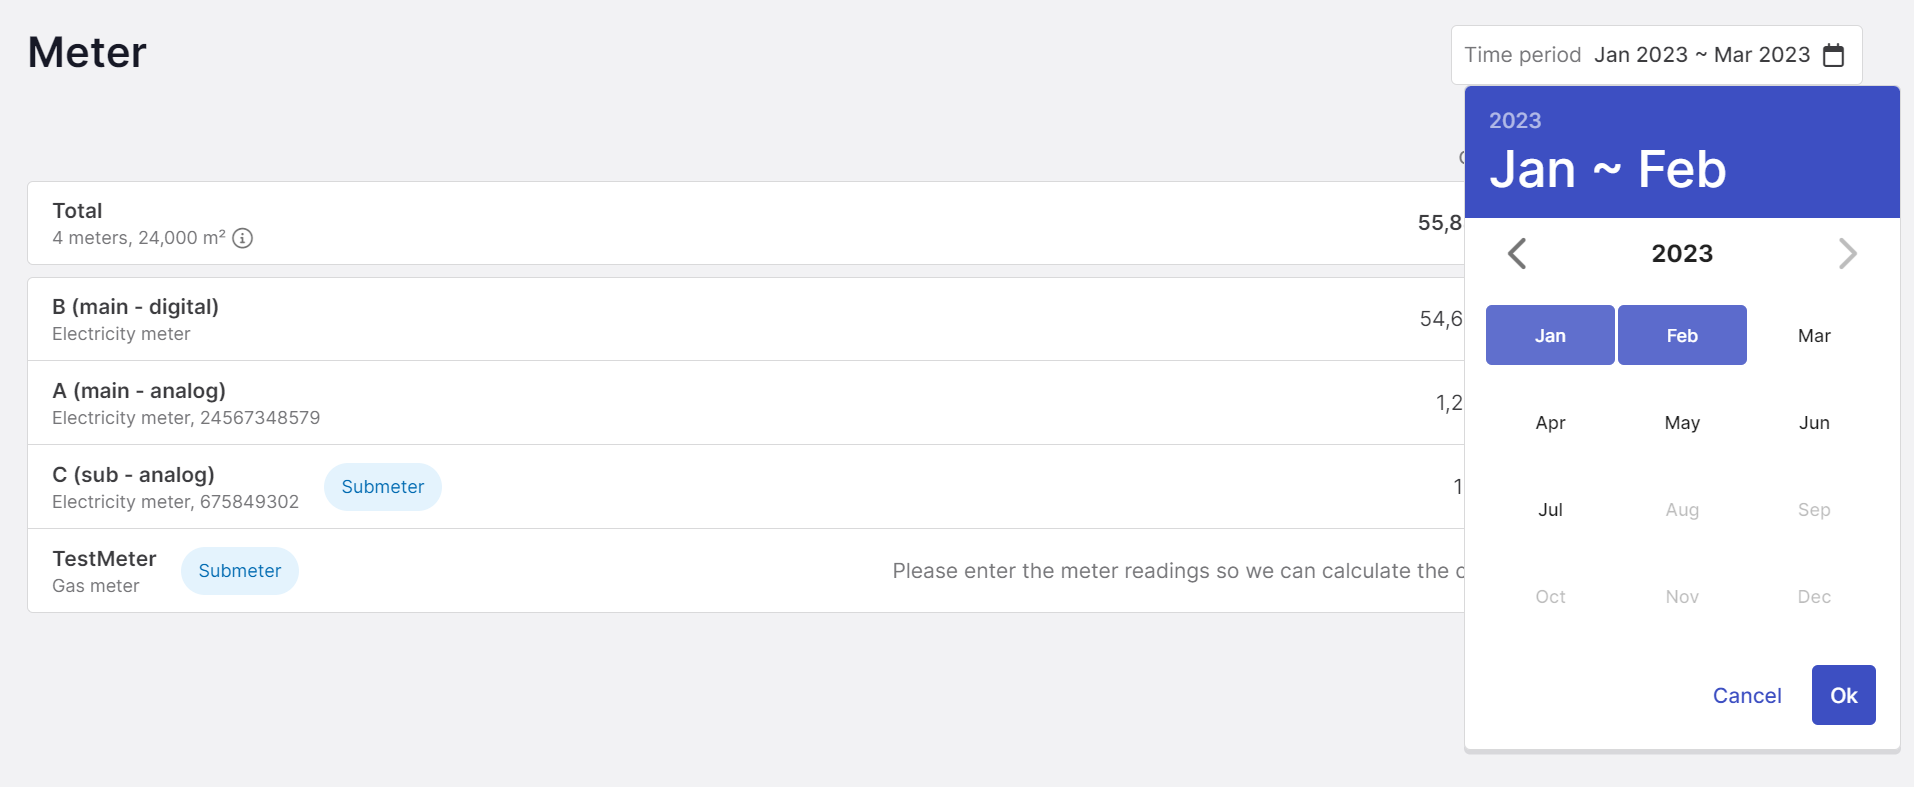
Figure 3: Meter page with Date Picker
Add new meter
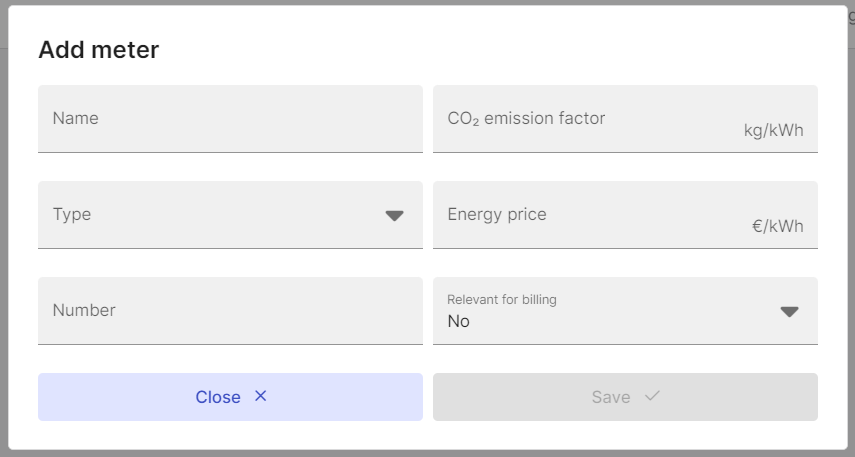
Figure 4: Prompts for information on new manual meters
To create a new meter:
- Click on "Add analog meter" in the top-right corner.
- Assign any name, it will appear in the list of meters and components on the Optimization page.
- Select type. Gas, heat, cooling or electricity meters can be created.
- (optional) Enter number. This field is optional. The meter number of the supplier can be entered here.
- (optional) Enter CO2 emission factor (e.g. "0.85"). This is needed to determine the emissions. It can be found in the billing statement of the energy supplier. If no value is entered, the analysis uses an industry standard value.
- Selection if billing relevant. Only meters relevant for billing are used for the consumption analysis.
- (optional) Enter energy price (e.g. "0.55"). This is needed to be able to determine the emissions. It can be found in the billing of the energy supplier. If no value is entered, the analysis uses an industry standard value.
- Save.
Edit existing meter
Meters that have already been created can be edited. To do this, the following steps must be carried out:
- Click on the three dots at the right end of the line.
- Click on "Edit meter".
- Change the meter information. Only the meter type cannot be changed.
- Save changes.
Enter meter readings and trigger analyses
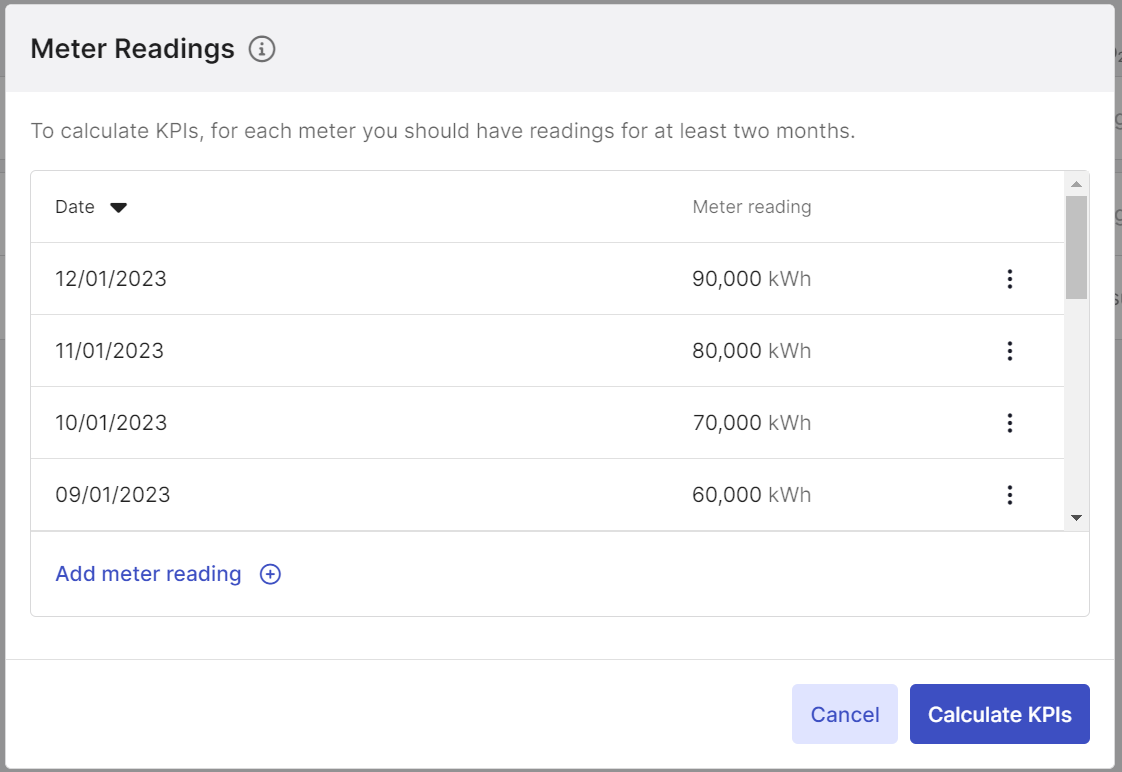
Figure 5: Overview of the meter readings entered, input options and option to trigger the analyses
If meter readings are missing for the calculation of the KPIs, the "Add meter reading" button is displayed. Meter readings for manually managed meters can be carried out by following the steps below:
- Click on "Add meter reading".
- Click on "Add meter reading" in the window that opens (see Figure 5).
- Select the date.
- Enter the meter reading.
- Click on "Save".
The analyses can be triggered by clicking on "Calculate KPIs". It is recommended to trigger the analyses after the last meter value has been entered. After running the analyses, the page must be reloaded. The input window can also be accessed by clicking on the three dots at the right end of the line and the option "View meter reading".
Visualize meter readings
Digital meters on the platform do not offer the option of entering meter readings manually. However, the recorded meter values can be visualized. The visualization of a meter is shown in Figure 2.
To visualize the meter values, click on the visualization icon to the left of the three dots. In the visualization, you have the option of freely selecting the time period displayed.
A second way to visualize the meter readings is to click on the three dots and select the option "View meter reading".
Delete meter
Existing meters can be deleted. This also removes all meter information. To delete a meter, click on the three dots on the right-hand side of the line. Then select "Delete meter". To delete the meter permanently, confirm the deletion process in the window that opens by clicking on "Delete". This action cannot be undone.